CSS-knappar: skapa snygga och responsiva knappar med ren CSS
En knapp kan verka enkel — tills du faktiskt ska bygga en som ser bra ut, fungerar på alla skärmstorlekar och inte skämmer ut sig för skärmläsare. CSS-knappar är en av de första sakerna de flesta webbutvecklare stylar själva, men det är förvånansvärt få som gör det riktigt ordentligt. Och visst, det finns ramverk som ger dig färdiga komponenter, men att förstå hur knappar i CSS fungerar under huven gör dig snabbare när du behöver anpassa, felsöka eller skapa något som inte finns i Bootstrap eller Tailwind.
Här går vi igenom hur du skapar CSS-knappar som håller måttet i produktion — från grundstyling och hover-effekter till responsivitet och tillgänglighet.
Grundläggande styling av CSS-knappar
Vi börjar med grunderna. En vanlig <button> utan styling ser rätt trist ut i de flesta webbläsare — grå, platt och med en font-size som varierar beroende på system. Att nollställa det och bygga upp stilen från grunden ger dig full kontroll.
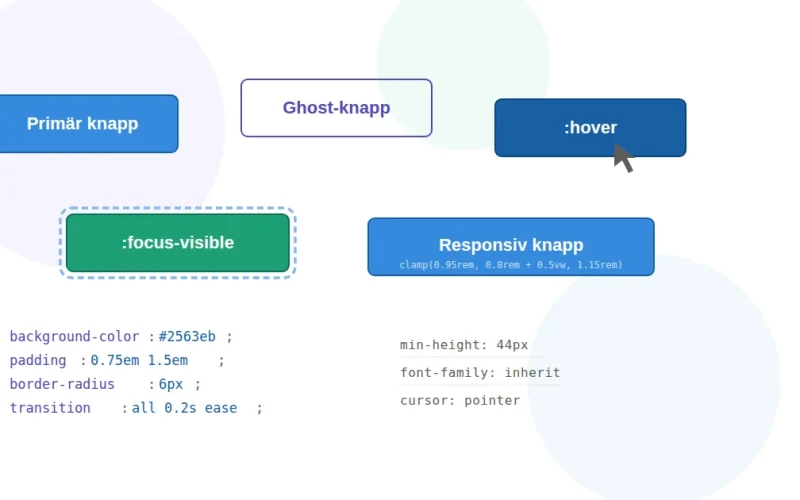
Här är en solid bas att utgå ifrån:
.btn {
  display: inline-flex;
  align-items: center;
  justify-content: center;
  padding: 0.75em 1.5em;
  font-size: 1rem;
  font-family: inherit;
  font-weight: 600;
  line-height: 1;
  color: #fff;
  background-color: #2563eb;
  border: 2px solid transparent;
  border-radius: 6px;
  cursor: pointer;
  text-decoration: none;
  transition: background-color 0.2s ease, transform 0.15s ease;
}
Några saker att notera. font-family: inherit ser till att knappen använder samma typsnitt som resten av sidan, vilket inte är standard i alla webbläsare. padding i em istället för px gör att knappens inre avstånd skalas med textstorleken, något som blir viktigt senare när vi pratar om responsivitet. Och inline-flex i kombination med align-items: center ger dig perfekt centrering av text och eventuella ikoner utan att behöva fuska med line-height.
Det är också värt att sätta border: 2px solid transparent redan från start. Det förhindrar att knappen ”hoppar” i storlek när du senare lägger till en synlig border vid till exempel focus-states.
Hover-effekter som knappar i CSS förtjänar
En knapp utan hover-effekt känns död. Användaren behöver visuell feedback för att förstå att elementet är interaktivt. Men det gäller att inte överdriva — subtila förändringar slår flashiga animationer i nästan alla gränssnitt.
.btn:hover {
  background-color: #1d4ed8;
  transform: translateY(-1px);
}

.btn:active {
  background-color: #1e40af;
  transform: translateY(0);
}
Den lätta förflyttningen uppåt med translateY(-1px) vid hover ger en känsla av att knappen ”lyfts”, och att den studsar tillbaka till normalläget vid active ger en taktil klickkänsla. Det är en klassisk teknik som fungerar bra utan att kännas överdådig.
Vill du skapa en variant med en mer distinkt stil fungerar en ghost-knapp bra som komplement. Den har transparent bakgrund och en synlig ram:
.btn--ghost {
  background-color: transparent;
  color: #2563eb;
  border-color: #2563eb;
}

.btn--ghost:hover {
  background-color: #2563eb;
  color: #fff;
}
Ghost-knappar är praktiska för sekundära actions i ett gränssnitt — de signalerar att det finns ett alternativ utan att konkurrera med primärknappen visuellt. Du kan också experimentera med box-shadow för att ge knappar mer djup vid hover, till exempel box-shadow: 0 4px 12px rgba(37, 99, 235, 0.3). Det ger en subtil glöd-effekt som fungerar bra på mörka bakgrunder utan att ta fokus från innehållet.
Responsiva knappar med CSS
Knappar som ser perfekta ut på en desktop kan bli obrukbara på en mobil. Tummar är inte lika precisa som muspekare, och en knapp som är 32 pixlar hög kan vara direkt frustrerande att träffa på en telefon.
Apples riktlinjer rekommenderar minst 44×44 punkter som tryckyta, och det är en rimlig tumregel. Genom att använda em-baserad padding och clamp() för fontstorleken skapar du knappar som anpassar sig smidigt utan att du behöver skriva mediaqueries för varje breakpoint:
.btn-responsive {
  display: inline-flex;
  align-items: center;
  justify-content: center;
  padding: 0.75em 1.75em;
  font-size: clamp(0.95rem, 0.8rem + 0.5vw, 1.15rem);
  font-family: inherit;
  font-weight: 600;
  line-height: 1;
  color: #fff;
  background-color: #2563eb;
  border: 2px solid transparent;
  border-radius: 6px;
  cursor: pointer;
  transition: background-color 0.2s ease, transform 0.15s ease;
  min-height: 44px;
}

.btn-responsive:hover {
  background-color: #1d4ed8;
  transform: translateY(-1px);
}

.btn-responsive:active {
  transform: translateY(0);
}
clamp(0.95rem, 0.8rem + 0.5vw, 1.15rem) sätter en nedre gräns på 0.95rem och en övre på 1.15rem, med flytande skalning däremellan baserat på viewport-bredden. Eftersom padding är satt i em växer hela knappen proportionellt med texten. min-height: 44px fungerar som en sista garanti att tryckytan aldrig blir för liten.
Behöver du knappar som fyller hela bredden i ett mobilt läge räcker det med en enkel mediaquery:
@media (max-width: 640px) {
  .btn-responsive {
    width: 100%;
  }
}
Responsiva knappar i CSS-grid och flexbox
Om knapparna sitter i en grupp, till exempel en rad med ”Spara” och ”Avbryt”, är flex-wrap en enkel lösning:
.btn-group {
  display: flex;
  flex-wrap: wrap;
  gap: 0.75rem;
}
På stora skärmar ligger knapparna i rad. Blir det trångt radbryts de automatiskt. Inga mediaqueries behövs.
Tillgänglighet: focus-states och CSS button-beteende
Det här är det moment som många hoppar över, och det märks. Tangentbordsanvändare, personer med motoriska funktionsnedsättningar och alla som navigerar utan mus förlitar sig på tydliga focus-states för att veta var de befinner sig.
Webbläsarnas inbyggda focus-ring ser olika ut överallt och tas ofta bort med outline: none — utan att ersättas med något bättre. Gör inte det. Använd istället :focus-visible, som bara aktiveras vid tangentbordsnavigering och låter musklickare vara ifred:
.btn:focus-visible {
  outline: 3px solid #93c5fd;
  outline-offset: 2px;
}
outline-offset skapar ett litet mellanrum mellan knappen och ringen, vilket gör den mer synlig och snyggare. Och eftersom vi inte rör outline vid :focus utan specifikt :focus-visible slipper du den blå ringen vid vanliga musklick — vilket var anledningen till att folk tog bort den från början.
Se också till att kontrastförhållandet mellan knappens text och bakgrund klarar WCAG AA, det vill säga minst 4.5:1 för normal text. Vit text på #2563eb klarar det med marginal, men om du väljer ljusare nyanser är det värt att dubbelkolla med ett verktyg som WebAIM Contrast Checker. Det gäller inte bara textfärgen — även hover-states och focus-ringen ska vara tillräckligt synliga mot bakgrunden de renderas på.
Glöm inte disabled-state
En knapp som inte går att klicka ska se ut som att den inte går att klicka:
.btn:disabled {
  opacity: 0.5;
  cursor: not-allowed;
  pointer-events: none;
}
pointer-events: none förhindrar alla musinteraktioner, och opacity: 0.5 ger en tydlig visuell signal. Kombinationen gör att hover-effekterna inte aktiveras av misstag.
Sammanfattning
CSS-knappar kräver mer omsorg än de flesta ger dem. Här är det viktigaste att ta med sig:
Använd em-baserade mått för padding och clamp() för fontstorlek — det ger dig responsiva knappar utan onödiga mediaqueries. Lägg alltid till hover- och active-states med subtila övergångar. Implementera :focus-visible med en tydlig outline för tangentbordsnavigering, det är inte valfritt. Sätt min-height: 44px för att garantera tillräcklig tryckyta på touchenheter. Och slutligen: börja med en transparent border redan i grundstilen, så slipper du layoutskift när du lägger till synliga ramar i andra states.
Med de här teknikerna på plats har du CSS-knappar som ser professionella ut, fungerar överallt och inte stänger ute någon. Det är ren CSS — inga ramverk behövs. Och nästa gång du ser en <button> utan hover-state eller focus-ring vet du exakt vad som saknas.